Discover the joy of making your own textured mirror using foam clay in a guided, beginner-friendly session. Perfect for anyone wanting to create a unique piece of art that reflects their personal style.
So, the first thing you’ll notice is how welcoming the whole vibe is. You settle in, meet a few friendly faces, and there’s this quick icebreaker that gets your creative juices flowing without any pressure. I remember feeling a bit unsure about working with foam clay, but the intro demo quickly showed me it’s pretty straightforward. You get to see how the clay feels, how to shape and layer it, and the cool textures you can create. It’s like painting with a soft, squishy brush! If you want to try something just as fun, check out DIY Custom Textured Mirror Making to find your next creative fix.

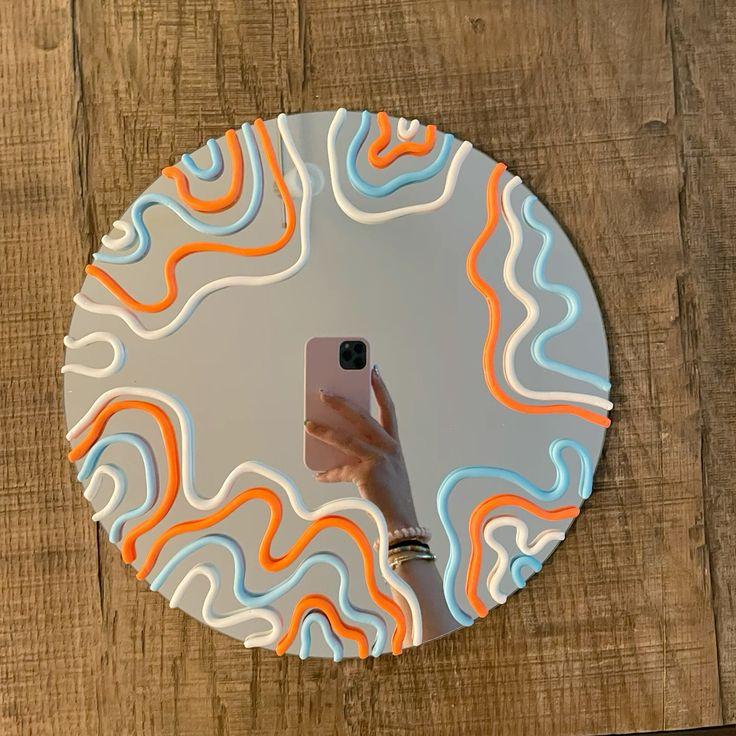
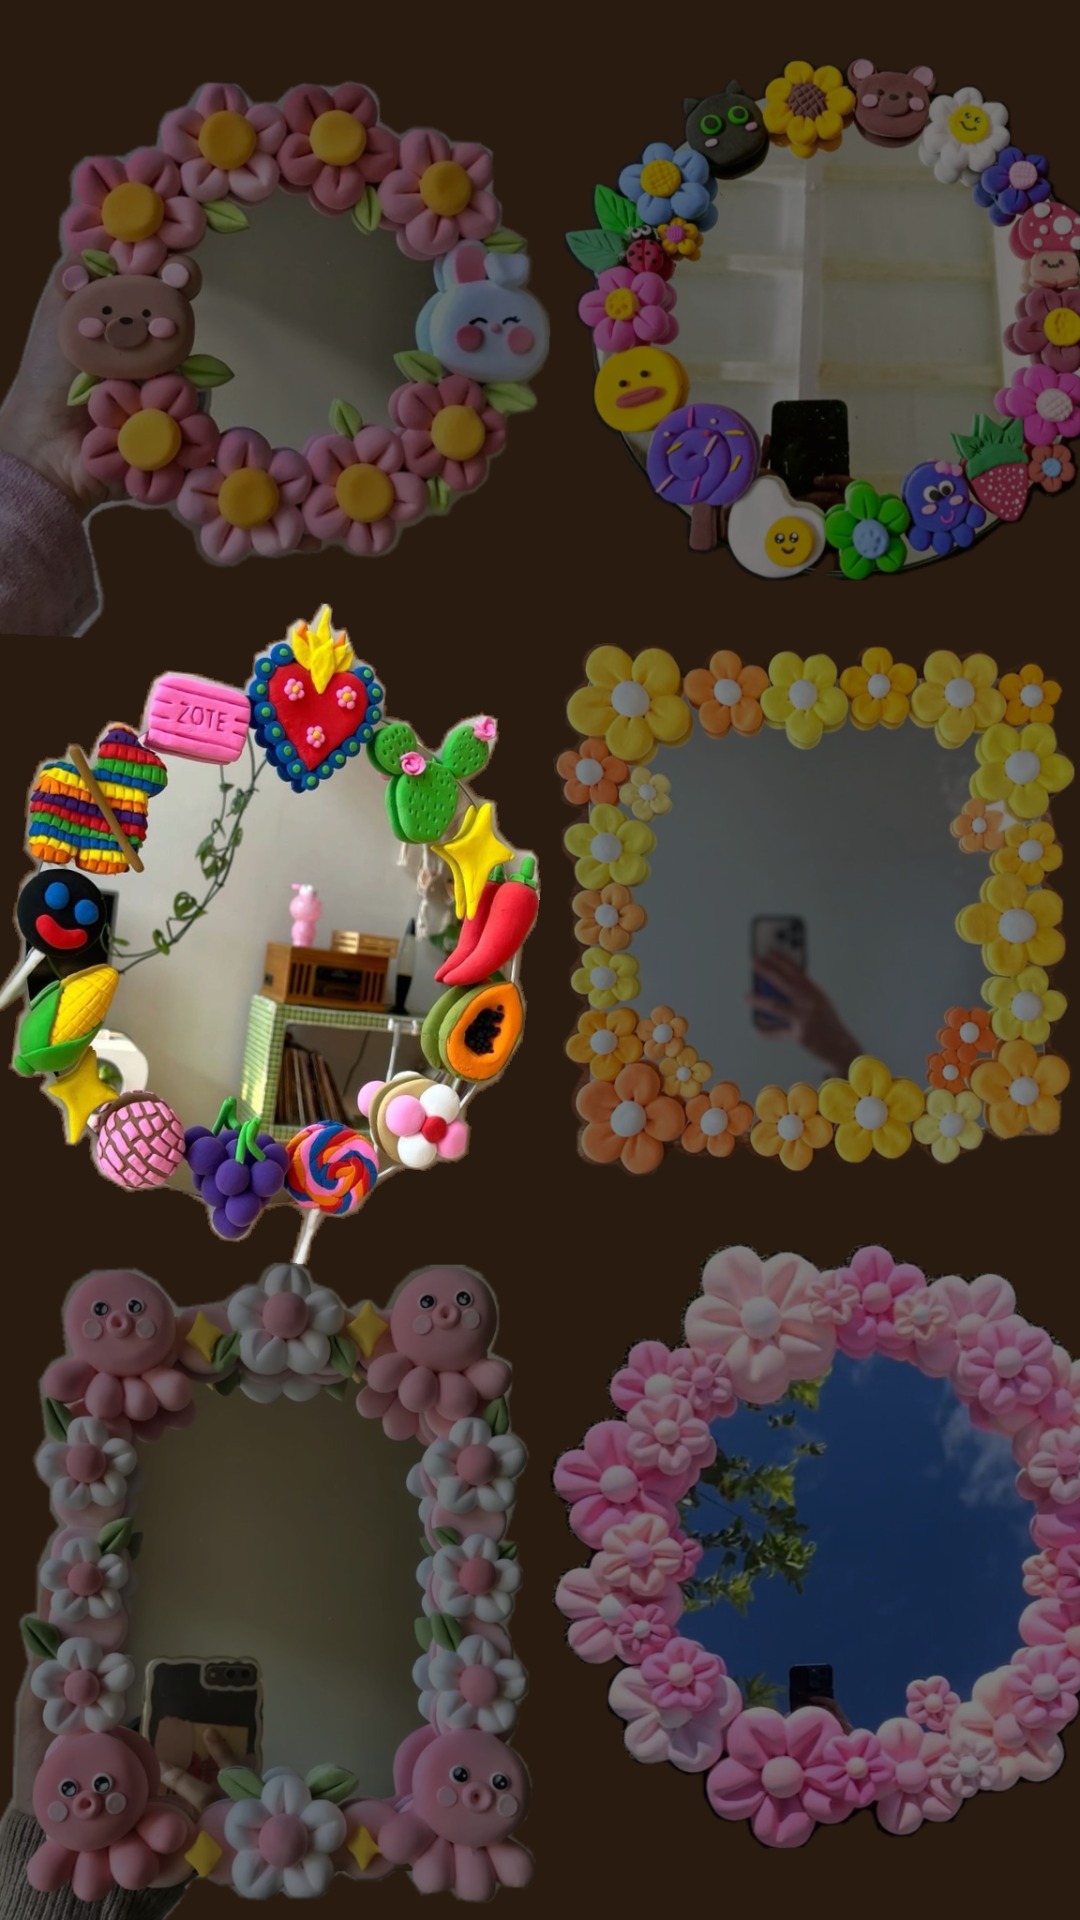
Next up, you sketch a quick layout to map out your mirror’s personality. This is where you get to decide if you want florals, abstract shapes, cute little characters, or even something earthy and minimal. I went with a playful floral theme, mixing soft colors and little textures that felt like spring had landed on my mirror frame. The best part? You totally make the rules here. No art degree needed, just your vibe. If you’re curious to explore different styles, you’ll love the variety you can create during the DIY Custom Textured Mirror Making session.
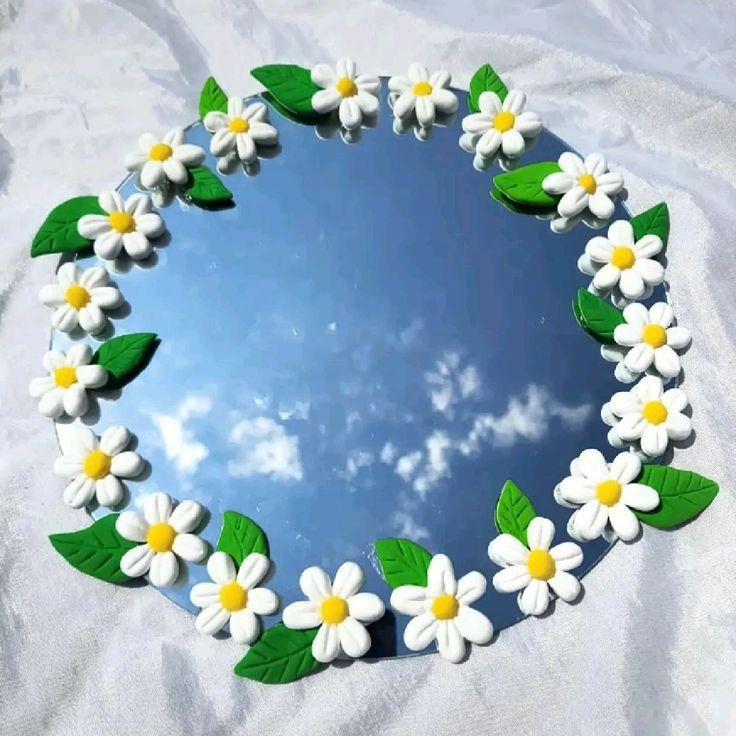
Then comes the fun, hands-on part: sculpting and layering the foam clay. You get to squish, stick, and build up textures, which honestly felt like a mini stress-buster. The instructor guides you step-by-step, so you’re never lost. I added layers of petals and playful shapes, watching the mirror transform right before my eyes. Here’s a quick peek at what you do:
– Shape foam clay pieces
– Layer and attach to the mirror frame
– Add tiny details for depth
– Smooth and polish edges
If you want to join in on this tactile joy, just search for DIY Custom Textured Mirror Making on the app, check for availability, and book your spot!
Once I’d finished sculpting, it was time to add the final touches , smoothing, balancing, and making sure everything looked polished. The instructor gave some handy tips on spacing and composition, which really made my mirror feel like a piece of art rather than just a craft project. Then came the best part: showing off our creations. There’s something special about seeing how everyone’s mirrors are so different yet equally awesome. Plus, there’s a mini photo session where you get to capture your mirror’s personality before taking it home. I felt proud, happy, and kind of amazed that I’d made something so unique. If you want to feel the same way, definitely try the DIY Custom Textured Mirror Making experience.
Share your experience